
About Linux Mint
Linux Mint is open source operating system distribution based on Ubuntu and Debian, for use on x86 x-64 compatible machines.It’s free.
Mint is designed to be easy to use and provides users with creative experiences, including multimedia support across desktop environments. This operating system is easier to install than most Linux distributions. Mint includes the necessary software for e-mail, online functions, as well as support for multimedia content, whether they are online or from users’ physical files and media.
Some advantages of Linux Mint
- It works out of the box, with full multimedia support and is extremely easy to use.
- It’s both free of cost and open source.
- It’s community-driven. Users are encouraged to send feedback to the project so that their ideas can be used to improve Linux Mint.
- Based on Debian and Ubuntu, it provides about 30,000 packages and one of the best software managers.
- It’s safe and reliable. Thanks to a conservative approach to software updates, a unique Update Manager and the robustness of its Linux architecture, Linux Mint requires very little maintenance (no regressions, no antivirus, no anti-spyware…etc).
How to install Linux Mint
Step 1: Create a live USB or disk
Go to Linux Mint website and download ISO file. This ISO file is the disk image that you can burn to a USB or DVD.
There are several versions of Linux Mint available. The default is Cinnamon. If your computer supports 64 bit, go with 64 bit Linux Mint 19.3 Cinnamon. If you know about other desktop environments, you can make your mind and choose whichever Mint version you want.
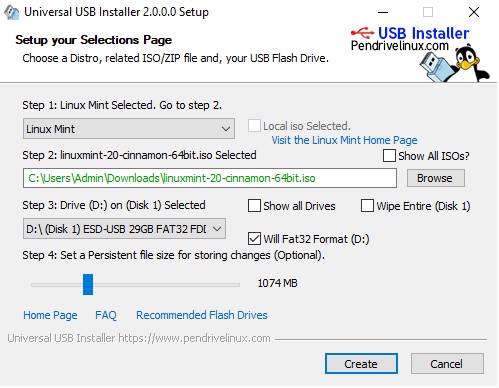
Once you have downloaded the Linux Mint ISO, you need a tool to write the image to a disk. I recommend using a free tool called Universal USB Installer in Windows:
It’s an executable exe file. Just double click on it to run the software and browse it to the ISO. Make sure that you have your USB key plugged in:
Step 2: Make a new partition for Linux Mint
This is where you have to be cautious. If you have multiple partitions (not the recovery ones), you can either use one of them or create a new partition from an existing partition. Your existing data will be safe if you have enough free space. Typically, you install Linux in under 10 Gb, however, if disk space if not a concern, I advise using 30-40Gb at least. This way you can have more space at your disposal for downloading and keeping various files.
In Windows 10, go to start menu and type ‘partition’. This will bring up Disk Management utility. Now carefully select the disk in which you’ll make some free space by shrinking the volume:

In my case, I only had the C Drive with 223Gb of space on it. So I shrunk it to make 110Gb of free partition on it. I recommend watch the video to see the exact steps you need more hint.
Step 3: Boot in to live USB
Plug the live USB or disk into the computer and restart the computer. While booting the computer press F10 or F12 function key (defers from computer to computer) to go to the boot menu. Now, choose the option to boot from USB or Removable Media.
Important Note: If your computer came with Windows 8 or Windows 8.1 and you upgraded your system to Windows 10, you may have to disable secure boot. Most modern system with Windows 10 should not need this step, especially with Linux Mint or Ubuntu.
Step 4: Start the installation
It takes some time to boot from the live USB or disk. Have some patience. Once it boots in to live disk, you’ll be provided to Try Linux Mint or Install Linux Mint. Even if you choose to try it, you can find the install option on the desktop:

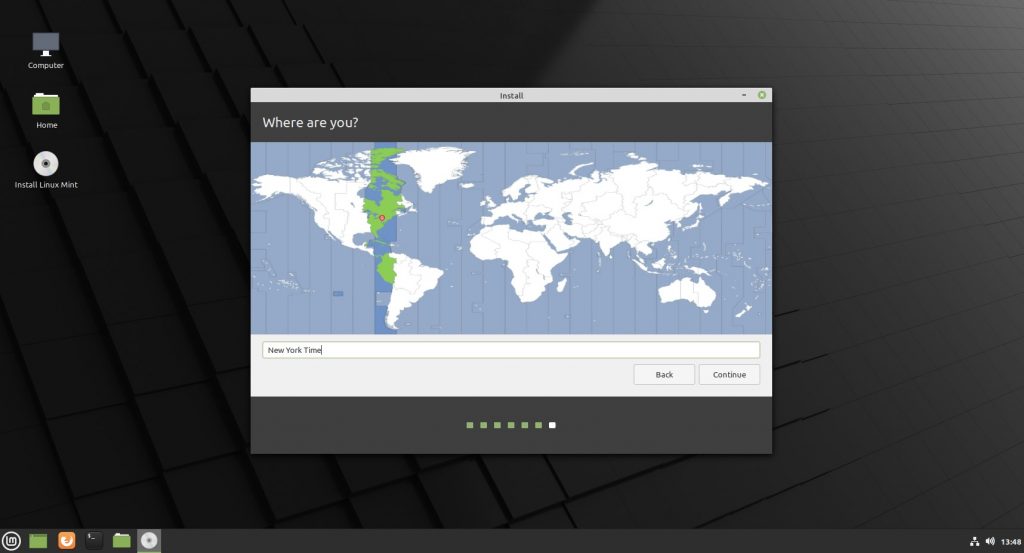
In next few screens, you’ll be asked to choose the language of the operating system. It will then do some checks on available space, battery and Internet connection.


Step 5: Prepare the partition
This is the most important part of the whole installation. Where to install Linux Mint?
If you see the option to Install Linux Mint alongside Windows, you can select that. Linux Mint will handle things on its own. If you do that, skip step 5 and step 6.
But as mentioned before, I prefer separate partitions for Windows and Linux. Windows is already installed here, we’ll prepare a new partition for Linux Mint. In the Installation Type window, choose Something Else:

Step 6: Create root, swap and home
Since you already created a new partition in Windows, it’s time to install Linux Mint on it. Now, there are several ways to do it. But here, I’ll show you my favorite way and that is to have a Root, a Swap and a Home.
Create a root partition first. Choose the free space available and click on +.

Here, choose the size of the root. Root is like your C drive in Windows. Installed software, updates and other system files are under this root partition. Home partition is for your personal documents, music, downloads etc.
If you have total 100 GB at disposal, give 30 GB to root. In any case, don’t give it less than 15 GB because if root runs out of space, your system will slow down and you’ll run into issues.
I opted to have 20 GB, choose ext4 file system, and mount point as / (i.e. root):

Now, next is to create the swap partition. Now the question is what should be the swap size for Linux Mint installation?
The answer depends upon your RAM size, your needs, available disk space and whether you would use hibernation or not. You can use the below suggestion:
- RAM less than 2 GB: Swap should be double the size of RAM
- RAM between 2 to 4 GB: Swap should be RAM size + 2 GB
- RAM between 6 GB to 8 GB: Swap should be size of RAM
- RAM more than 8 GB: Swap should be half the size of RAM or less
Don’t spend too much time thinking about swap. It is helpful for systems with less memory. For system with more than 8 GB of RAM and SSD, the less the swap, the better it is.
Newer version of Linux Mint utilize Swap file. It creates a special file under root and utilizes it as swap area. You can have both swap partition and swap file in a system.

The next step is to create Home. Try to allocate the maximum size to Home because this is where you’ll be downloading and keeping the files.

Once you have created Root, Swap and Home partitions, click on Install Now button.

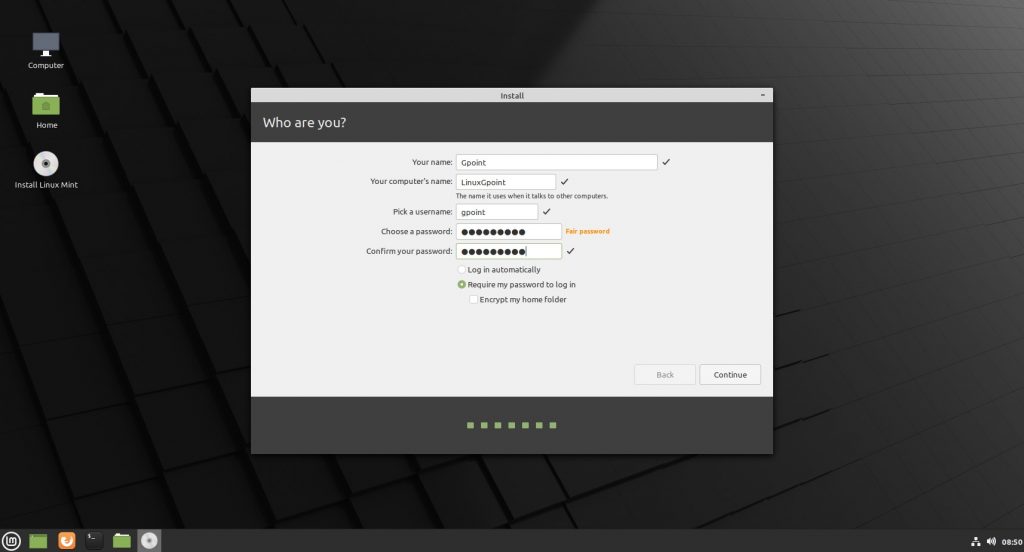
Step 7: Follow the trivial instructions
Technically, you have crossed the main hurdle if you reached this point successfully. Now you will be taken through a number of screens to select options like keyboard layout, login credentials etc. You don’t need to be a genius to figure out what to do here afterward. I have attached screenshots for reference purpose here.


Once the installation is over, you will be presented with the option to keep trying live version or to restart the system.

And that would be it. On next boot, you will see the option of Linux Mint on the grub screen. And thus you can enjoy the beautiful and beginner-friendly Linux distribution. I hope you found this guide to Linux Mint dual boot with Windows helpful.


![[WHAT IS CRONTAB?] – How to use CronTab Linux](https://linuxgpoint.com/wp-content/uploads/2019/04/how-to-crontab1.jpg)
